MobSink Multiple Sinks Simulator
Welcome to MobSink Multiple Sinks Simulator website.
MobSink is a WSN simulator developed at LARA to implement a multiple sinks mobility algorithm developed by João Paulo Just Peixoto and Daniel G. Costa. Here you will find useful information about how to use our simulator and download its source code and packages for Linux and Windows.
MobSink is licensed under GPLv3.
Download
- Linux: mobsink-1.4-linux_amd64.tar.gz
- Windows: mobsink-1.4-win64.zip
To run MobSink on Linux, you will need libwxgtk3.0.
Source code
Source code can be found on my GitHub account:
- MobSink: https://github.com/jpjust/mobsink
- osm2mobsink: https://github.com/jpjust/osm2mobsink
What is MobSink Multiple Sinks Simulator?
MobSink Multiple Sinks Simulator is a WSN simulator developed by João Paulo Just Peixoto and Daniel G. Costa in 2015 to simulate a new multiple sinks positioning algorithm. Each sensor node has a relevance level (RL) in the WSN, which is considered when calculating sinks position. The aim is to reduce energy usage by prioritizing more important nodes.
Basic usage
In the main screen, you will see a blank square. This is your network area. Just click on it to insert a node (blue circle). The relevance level of the node can be set in “RL:” textbox on the toolbar. The relevance level must be in a range between 0 and 15.
You can also insert several sensors at once like a grid or in a random fashion. You just need to type how many sensors you want to insert in “Sensors:” textbox and click ![]() to insert like a grid or
to insert like a grid or ![]() to insert randomly. Also, you can use random relevance levels by clicking
to insert randomly. Also, you can use random relevance levels by clicking ![]() .
.
After positioning the sensor nodes, you may insert sinks. Just type how many sinks you will want and choose a sink positioning algorithm:
- Static sinks: sinks will be in fixed positions
- Fixed move: sinks will move vertically or horizontally at constant speed
- Relevance based: sinks will be positioned dynamically, considering the relevance levels of sensor nodes (Forgy, Random and Just are the k-means clustering algorithms that can be used)
At last, click ![]() and the simulator will place the sinks in their positions. Click
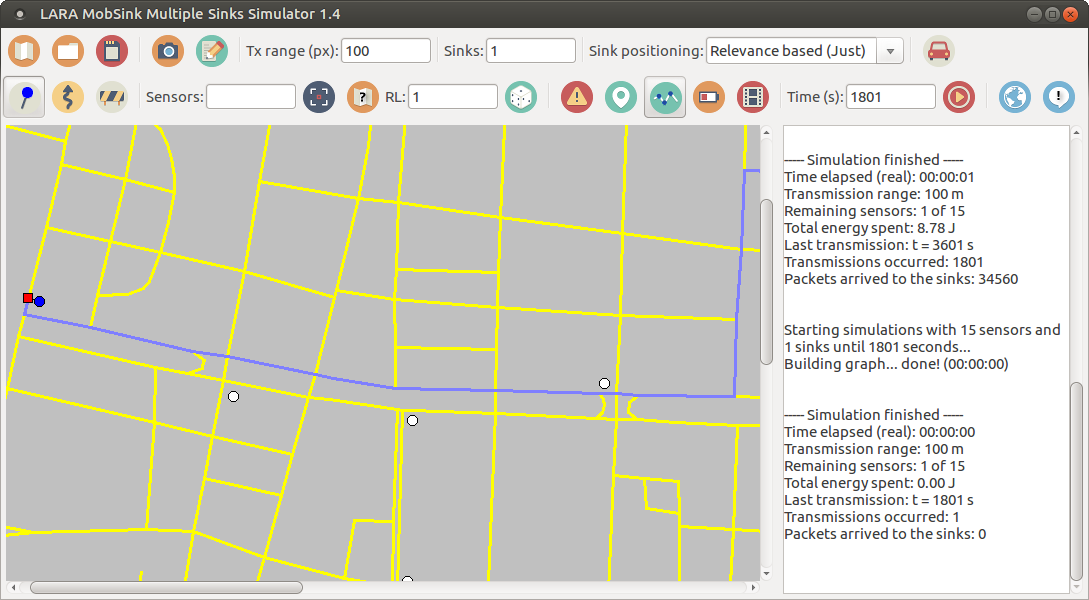
and the simulator will place the sinks in their positions. Click ![]() to start the simulation. The results will be shown in the text area on the right.
to start the simulation. The results will be shown in the text area on the right.
You can change the sinks configuration and start a new simulation. To create a new network, just click ![]() .
.
At this point, you are ready to run simple simulations.
Creating paths
You can create paths for sinks movements by clicking on ![]() . By doing this, in Relevance Based positioning, sinks will be placed only on created paths. If a sink moves, it will go through the created paths. This is useful if you want to simulate roads or restrict movements. Also, every time a sink moves, the used path will be highlighted and printed in the standard output (just run the program in a command-line terminal). Dijkstra’s algorithm is used to determine the best path.
. By doing this, in Relevance Based positioning, sinks will be placed only on created paths. If a sink moves, it will go through the created paths. This is useful if you want to simulate roads or restrict movements. Also, every time a sink moves, the used path will be highlighted and printed in the standard output (just run the program in a command-line terminal). Dijkstra’s algorithm is used to determine the best path.
Adding obstacles
You can also add some obstacles by clicking on ![]() . Sinks can’t be positioned in that areas. It is another way to restrict sinks positioning. But pay attention: if you use both paths and obstacles, paths will be prioritized. It is possible to have a sink inside an obstacle if there is a path passing through it.
. Sinks can’t be positioned in that areas. It is another way to restrict sinks positioning. But pay attention: if you use both paths and obstacles, paths will be prioritized. It is possible to have a sink inside an obstacle if there is a path passing through it.
Data output
You can have real-time data if you click on ![]() . The current simulation time, energy usage and number of active nodes will be shown in the text area on the right. Also, simulation will be animated. You can see every sinks movement (of course, it may be too fast for you to see sometimes). By enabling animation, simulation will take longer to finish.
. The current simulation time, energy usage and number of active nodes will be shown in the text area on the right. Also, simulation will be animated. You can see every sinks movement (of course, it may be too fast for you to see sometimes). By enabling animation, simulation will take longer to finish.
Also, you can save all simulation data by clicking on ![]() button. All data will be saved in a CSV file (including sinks movements). You can also save your network by clicking on
button. All data will be saved in a CSV file (including sinks movements). You can also save your network by clicking on ![]() , so you can simulate it again later (just load it using
, so you can simulate it again later (just load it using ![]() ). And if you need to use the image of your simulation in a paper, just click
). And if you need to use the image of your simulation in a paper, just click ![]() (you don’t need to take screenshots).
(you don’t need to take screenshots).
Advanced usage
Version 1.4 brings new features. Now it’s possible to configure dynamic sensors behavior and traffic controls.
Dynamic sensors can be used to schedule sensors’ changes during simulation. A sensor can start the simulation transmitting data and then turn itself off after some time. This is useful to simulate events. Traffic control can be used to simulate traffic jams over time. You can specify also speed limits, one-way streets and blocking. For now, these features can only be set up by editing the WSN XML file.
Sensor control
Open the XML file for you WSN. You will see some <sensor> tags. This tag contains the sensor position and initial relevance. Under this tag, you can change its relevance and enable/disable it using a <control>. See the example below:
<sensor x="100" y="200" rl="1">
  <control time="0" enabled="false"/>
  <control time="60" rl="5" enabled="true"/>
  <control time="120" rl="10" enabled="true"/>
  <control time="180" enabled="false"/>
</sensor>
The sensor above is positioned at (100, 200) in the WSN and have an initial relevance level of 1. But the control tag disables it initially (time="0"). After 1 minute of simulation, it is enabled with relevance level of 5. After 2 minutes of simulation, its relevance level raises to 10. Finally, after 3 minutes of simulation, it is once again disabled.
It is possible to set several changes over time in every sensor.
Traffic control
The traffic control is made using the <traffic> tag under <path>. The <path> tag contains the path’s points A and B (from and to) and its flow. The flow can be any of the following:
ab: sinks can move only from point A to B.ba: sinks can move only from point B to A.- Empty: if this is a bidirectional path, just leave this property empty or don’t use it.
Just like the <control> tag, the <traffic> tag requires the time of the change and have the following properties:
speedlimit: the road speedlimit. If not specified, MobSink will use the WSN default speedlimit (set in the<network>tag).traffic: the traffic jam status, ranging from 0 (stopped traffic) to 1 (normal traffic).blocked: it the road is blocked.
If you want to use traffic control, you MUST specify a default speed limit in <network> tag like the example below:
<network width="1000" height="1000" speedlimit="50">
See the example below of traffic control:
<path xa="100" ya="200" xb="150" yb="250" flow="ab">
  <traffic time="1" speedlimit="60" traffic="1"/>
  <traffic time="120" speedlimit="60" traffic="0.3"/>
  <traffic time="240" speedlimit="60" blocked="true"/>
  <traffic time="360" speedlimit="80" traffic="1"/>
</path>
The path above goes from point A = (100, 200) to point B = (150, 250). The flow property says sinks can move only from point A to point B in this path. In the beginning (time="1"), the speed limit for this road is set to 60 Km/h and the traffic is flowing normally (sinks will move at 60 Km/h). After 2 minutes of simulation, the speed limit remains the same, but the sinks can move only at 30% of max speed due to a traffic jam (traffic="0.3"). After 4 minutes, the road is blocked. Finally, after 6 minutes, the road goes back to its normal traffic and the speed limit is raised to 80 Km/h.
Just like the sensors, traffic control can be made in every path.
WARNING: If you create sensor or traffic controls, don’t click the ![]() button in GUI, it will overwrite the changes you have made in the XML file.
button in GUI, it will overwrite the changes you have made in the XML file.
Command line usage
MobSink can be ran from command line for batch simulations. See below a list of all command line options for MobSink:
  -h, --help            displays help on the command line parameters
  -n, --network=<str>   load network from XML file
  -o, --output=<str>    print results to output file
  -s, --sinks=<num>     how many sinks to use
  -a, --algorithm=<num> which positioning algorithm to use: 0=static, 1=fixed_v, 2=fixed_h, 5=just
  -t, --traffic=<num>   use traffic control: 0=no (default), 1=yes
OpenStreetMaps to MobSink converter
MobSink provides a tool to convert OpenStreetMaps OSM files to MobSink XML. If you want to simulate a WSN in a real map, just export your map from OpenStreetMaps and use osm2mobsink to convert it. The basic usage is:
osm2mobsink -i original_map.osm -o wsn_map.xml
This will convert a file using the default options. Below, a list of all options for osm2mobsink:
  -h, --help            displays help on the command line parameters
  -i, --input=<str>     load OSM XML data from input file
  -o, --output=<str>    save MobSink XML network to output file
  -nw, --width=<num>    set the default MobSink network width
  -nh, --height=<num>   set the default MobSink network height
  -s, --speed=<num>     set the default MobSink network speed limit (default: 50)